Fermenting at Home Without Buying Anything
You can start fermenting tonight with cabbage, salt, and a jar you already own. No crocks, no starter culture, no kit required.
Half a head of cabbage, two teaspoons of salt, and a clean jar is a batch of sauerkraut. That's the whole recipe. No starter culture, no special crock, no fermentation kit with an airlock and a weight system that costs $40. The bacteria that turn cabbage into kraut already live on the cabbage. Salt and time do the rest.
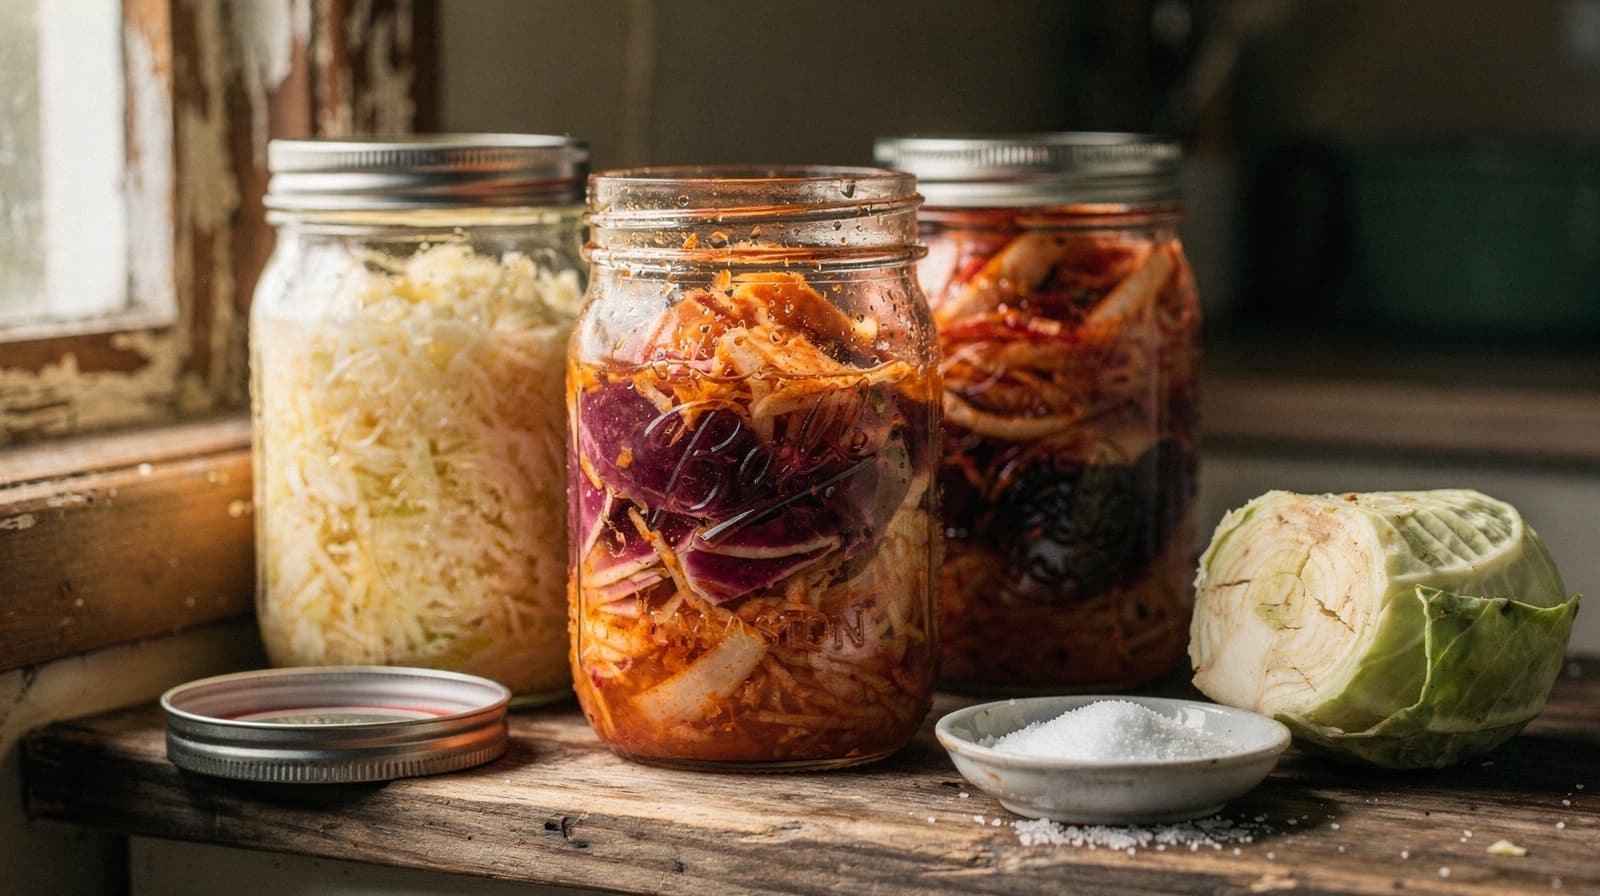
Most fermentation guides make the process sound more technical than it is, probably because there's a whole industry of equipment built around a process that worked fine in stoneware crocks for a few thousand years. You can skip the equipment. You need salt, vegetables, a container, and patience measured in days, not months.
Salt does two jobs at once
Salt pulls water out of the vegetables through osmosis, creating a brine that submerges them. That brine is what keeps oxygen out, which matters because the bacteria you want (lactobacillus) thrive without oxygen, while the mold and rot-causing organisms you don't want need it.
The second job is selection. Salt at the right concentration slows down the bad bacteria more than it slows the good ones, giving lactobacillus a head start. Too little salt and you risk mush and off flavors. Too much and fermentation stalls entirely.
For a basic vegetable ferment, aim for 2% salt by weight of the vegetable. Weigh the cabbage, multiply by 0.02, and that's your salt in grams: 800g of cabbage takes 16g of salt. Without a scale, use 1 to 1.5 tablespoons per pound and adjust on the next batch.
The jar-and-plate method
You don't need a fermentation weight. A small jar filled with water, set on top of the shredded vegetable inside a larger jar, does the same job of keeping everything submerged under the brine.
- Shred or chop your vegetable and toss it with salt in a bowl
- Massage or pound it for a few minutes until it releases liquid and starts to look wilted
- Pack it tightly into a clean jar, pressing down so the brine rises above the solids
- Weight it down with a smaller water-filled jar or a clean rock, so nothing floats above the liquid
- Cover loosely (a cloth or a lid set on but not sealed) so gas can escape
Leave it at room temperature, out of direct sun, and check it once a day. You'll see small bubbles within 24 to 48 hours. That's fermentation starting.
What to ferment first
Cabbage is the easiest starting point because it's forgiving and cheap, usually under a dollar a pound. But almost any firm vegetable works with the same salt ratio.
- Cabbage for basic sauerkraut, ready to taste in 5 to 7 days
- Carrots, sliced into coins or sticks, brined rather than salt-massaged since they don't release much liquid on their own
- Radishes, which ferment fast, often ready in 3 to 4 days
- Green beans, whole, for a sour pickle-style ferment
- Whatever's about to turn. Wilted vegetables headed for the bin are fine candidates, since fermentation doesn't need pristine produce
Take that last one seriously. Half a bendy carrot and the outer leaves of a cabbage make the same kraut as a perfect head. If you're regularly staring down produce that's about to go bad, our guide on reducing food waste covers the broader strategy. Fermentation is one of the few methods that improves texture and flavor instead of postponing the bin.
How to tell it's working (and how to tell it's not)
Bubbles are the main sign. You'll also notice the brine gets cloudy, and the vegetable's color dulls slightly as it softens. The smell shifts from raw-cabbage to something tangier, a little like vinegar starting to form.
Taste it starting on day 3. There's no single correct stopping point. Some people like kraut at day 5, mildly tart with real crunch. Others ferment for three weeks for a stronger, softer result. Taste daily until it hits the sourness you want, then move it to the fridge, where cold slows fermentation down to nearly nothing.
A thin white film on top is kahm yeast. It's harmless, so skim it off and carry on. Fuzzy mold in green, black or pink, or a smell closer to a bin bag than to vinegar, means that batch goes in the compost, not on a plate.
Troubleshooting a stalled or unfamiliar ferment
Room temperature sets the clock. A jar at 65°F can take twice as long to reach the same sourness as one at 75°F, so a kraut that a recipe calls done on day 5 may want day 9 in a cold fall kitchen. A quiet day 3 is not a failed batch.
No bubbling at all by day 4 is a different story. It's almost always too little salt or too little liquid. Press the vegetables back under the brine, top up with 2% brine if the level has dropped below them, and give it two more days before you write it off.
Beyond cabbage: brined ferments
Vegetables that don't release much liquid on their own, carrots, green beans, cauliflower, need a separate brine rather than a salt massage. Dissolve the same 2% salt ratio into water (roughly 1 tablespoon salt per 2 cups water as a rough starting point), pour it over the vegetables packed into a jar, and weigh them down the same way. The process and timeline are otherwise identical.
Nothing has to be juicy enough to brine itself, which widens the field considerably. Whole garlic cloves, sliced jalapeños and peeled hard-boiled eggs all work in a plain 2% brine.
Where this fits into a normal kitchen routine
Fermenting is not a weekend project. It's a jar on the counter that you glance at while the kettle boils, plus one taste a day from day 3 on.
If you already keep essential pantry staples on hand, you have everything a first ferment needs except the vegetable. And once there's usually a jar going, the crisper drawer stops being a graveyard, which is most of the argument in cooking with what you have.
So: shred half a cabbage tonight, weigh it, add 2% salt, and pack it into a jar before you go to bed.