Smash Burgers at Home, Without Filling the House With Smoke
How to get a real smash burger crust on a home stove, with the exact pan heat, fat choice, and timing that actually make the difference.
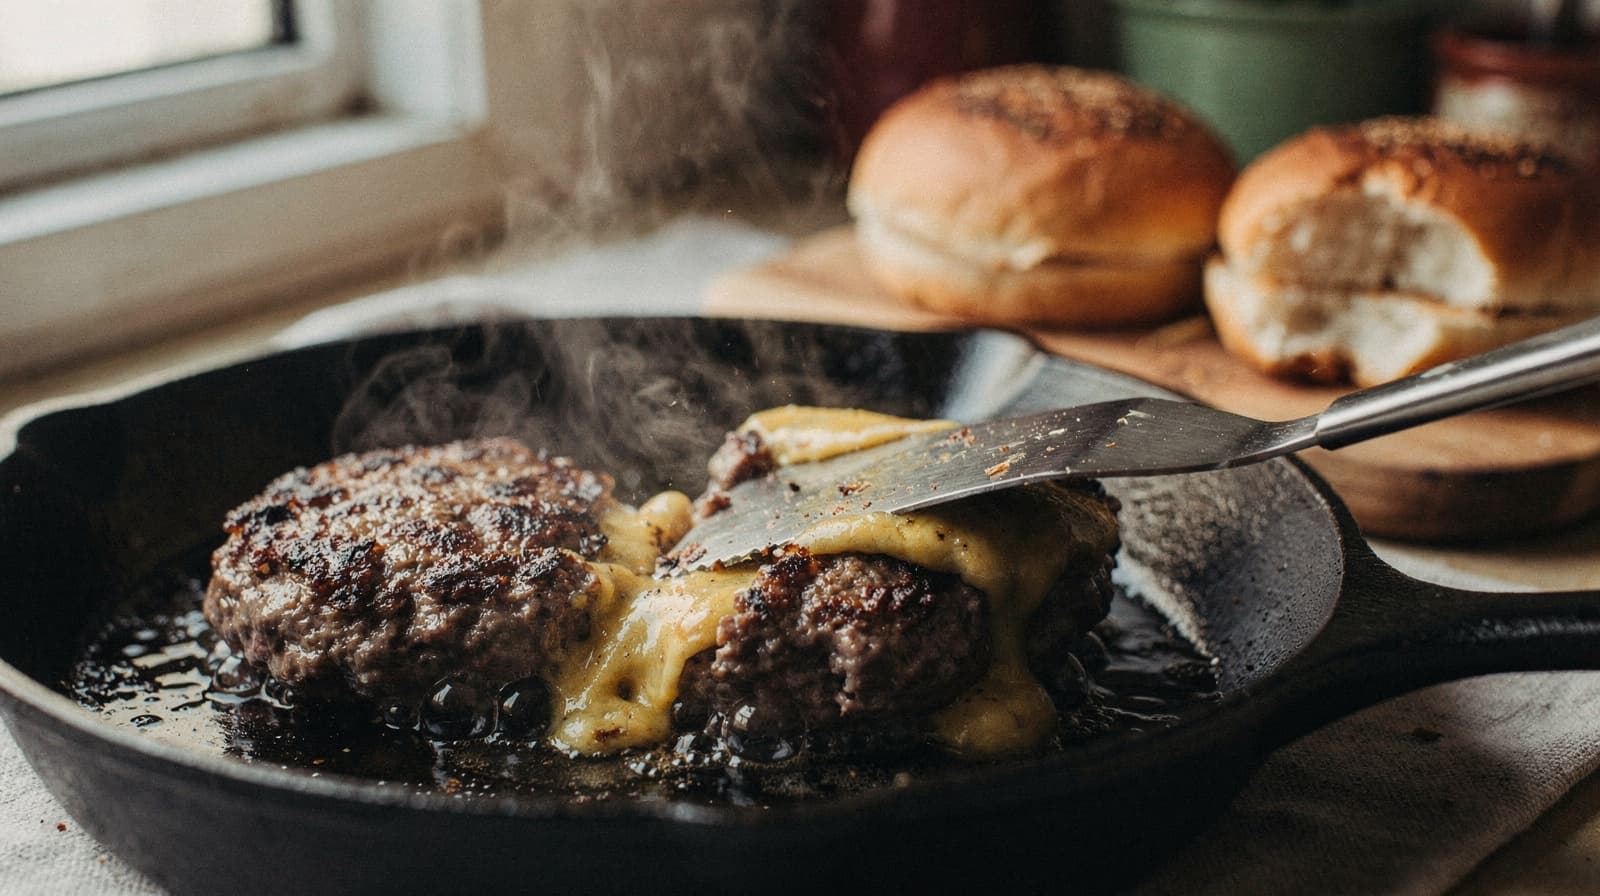
A smash burger's crust comes from contact, not from flipping technique or a secret spice blend. Ground beef pressed hard against a screaming-hot surface caramelizes in about 90 seconds, and that lacy, browned crust is the entire point of the format. Get the pan hot enough and the rest takes care of itself.
Most home attempts fail for one reason. The pan isn't hot enough, so instead of a crust you get gray, steamed beef with a faint sear around the edge. Fix that one variable and 80% of the problem goes away.
The pan matters more than the beef
A cast iron skillet or carbon steel pan holds heat far better than a nonstick skillet, and that heat retention is what makes the smash work. When cold beef hits the pan, the pan's temperature drops instantly; a thin nonstick pan doesn't have enough thermal mass to recover before the crust has a chance to form, so the meat just steams in its own juice instead of browning.
Preheat cast iron over medium-high for a full 5 minutes before the first patty goes in. It should be hot enough that a drop of water skitters and evaporates in under a second. If you're using a griddle, same rule: get it fully preheated before anything touches the surface.
Fat choice and portioning
Standard 80/20 ground beef (80% lean, 20% fat) is the right ratio; leaner blends dry out under the smash technique because there's not enough fat rendering to keep the meat from becoming tough. Portion into loose 2.5-3 ounce balls, don't compact them, and keep them cold until the moment they hit the pan.
Add a teaspoon of neutral oil (avocado or vegetable, not olive, which smokes too early) to the pan right before smashing, just enough to keep the beef from sticking on first contact.
The smash
Place a ball of beef in the hot pan and press down immediately with a sturdy spatula, using a second flat object (another spatula, a bacon press, or the bottom of a small pot) to add weight if your first press doesn't flatten it enough. You want the patty at roughly 1/4 inch thick and about 4-5 inches across, spread thin enough that the edges go lacy and crisp.
Salt generously right after smashing, while the surface is still exposed. Don't move the patty for 90 seconds to 2 minutes; moving it too early tears the crust off before it's set. Flip once, add cheese if you're using it, and cook another 60-90 seconds. Two patties stacked with cheese between them, on a griddled bun, is the standard double.
Managing the smoke
This is the part that stops people from doing this indoors. High heat plus rendering fat means smoke, and a home kitchen without commercial ventilation notices it fast. A few things cut it down without ruining the technique:
- Crack a window and run the exhaust fan on high before you start, not after the smoke alarm goes off
- Wipe excess grease from the pan between patties with a folded paper towel held by tongs; built-up fat is what smokes hardest, not the meat itself
- Cook outside on a griddle or cast iron pan set on a side burner if you have one; it's the same technique with zero indoor smoke
- Skip restaurant-level heat if smoke is a dealbreaker; medium-high instead of high still browns the patty, with less lace at the edges
Common mistakes that ruin the crust
Nearly every failed first attempt traces back to touching the patty before the crust has set. Press the meat a second time, chasing a thinner patty, and you peel away the crust that had started to form, leaving the surface pale where it should be brown.
Flipping early does the same damage from the other direction. The crust needs the full 90 seconds of undisturbed contact, and lifting a corner to check just restarts the clock.
Overcrowding is the other big one. Two patties that touch steam their shared edge instead of searing it, so give each one an inch of clearance and cook in two batches if you have to.
Cold beef costs you crust as well. Straight from the fridge at 35°F, more of the cook time goes into warming the interior and less into browning the outside. Pull the beef out 10 minutes before cooking, which is short enough to be perfectly safe.
The bun and the build
Butter and griddle the bun cut-side down for 30-60 seconds in the same pan after the patties come out. Thirty seconds of work, and a toasted bun stops the bottom from going soggy under the patty. Classic build order, bottom to top: bun, sauce, patty with cheese, pickles, onion, second patty if doubling, sauce, top bun. Keep toppings thin. A smash burger's appeal is the crust-to-meat ratio, and piling on vegetables buries it.
Cost per burger
Ground beef runs roughly $4.50-6/lb depending on region, and a pound makes about 5-6 smashed patties, so a double smash burger costs somewhere around $2-2.50 in beef, plus cheese and a bun. That puts a pair of homemade doubles well under what a fast food combo costs for one, with a better crust than most drive-throughs manage.
This is a good one to fold into a rotation of budget-friendly dinners since the ingredient list is short and the cook time per burger is under 5 minutes once the pan is hot. It also slots neatly into a lineup of one-pan weeknight dinners, since the whole meal, patties, buns, and a quick side, comes off the same piece of cast iron.
If this becomes a regular Friday-night thing in your house, save your exact ratio, salt timing, and sauce combination somewhere you'll find it again. RecipeClip works fine for a recipe this simple, and it beats trying to remember three weeks later whether you used one tablespoon of mustard in the sauce or two.
Next time, before you touch the beef, set a 5-minute timer for the pan.